Create an HTML Text Block

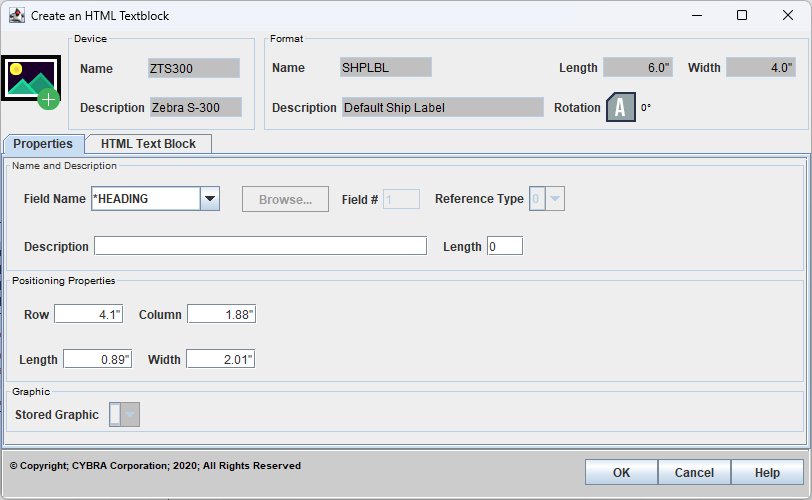
The Create an HTML Textblock dialog allows you to create a special new type of text block field. This enhanced text block now allows free form typing, carriage returns, greatly increased number of font and style choices, variable field data, automatic word wrap, and much more. Currently, HTML Text Block is available only on MarkMagic Zebra and Laser printer drivers.
To create an HTML text block, click the Create an HTML Text Block button and then drag a boxed area on the JMagic canvas where you would like the text block to be. Then start typing!
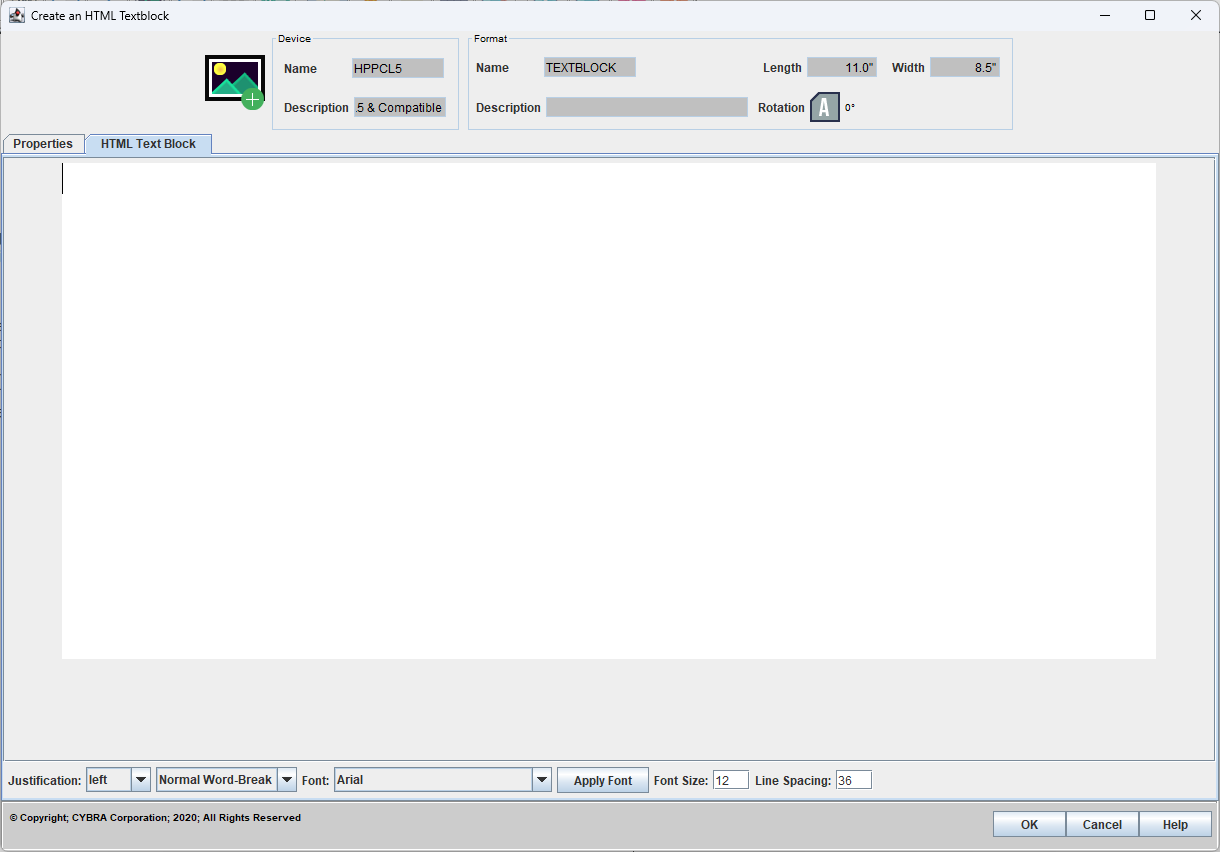
All options for manipulating the text are at the bottom of the HTML Text Block editor panel.
- Justification - Select an overall justification for all text within the text block.
- Left - Text will be left justified
- Center - Text will be left justified
- Right - Text will be right justified
- Justify - Where applicable text lines will stretch the full width of the text block area
- Word wrap options - Various word wrapping settings
- Normal Word-Break - Text wraps naturally at soft wrap opportunities, such as spaces or hyphens. Words are not broken.
- Overflow Clip - When text overflows the text block width, it is abruptly cut off at the container's edge.
- Overflow Ellipsis - When text overflows the text block width, it is truncated, and an ellipsis ("...") is added at the end to indicate that text has been cut off.
- Font - Choose from all available system fonts. Unlike all other options here, fonts can be applied to individual portions of the text block and are not limited to just the entire text block. When a font has styles built in, CTRL+I, CTRL+B and CRTL+U can be used for italic, bold or underline styling. Select the text in the text block editor screen with your mouse and then click Apply Font button to update the font for that string of text.
- Font Size - The point size for all text within the text block. Set the desired value and press Enter to apply.
- Line Spacing - Set the desired line spacing value in points and press Enter to apply.
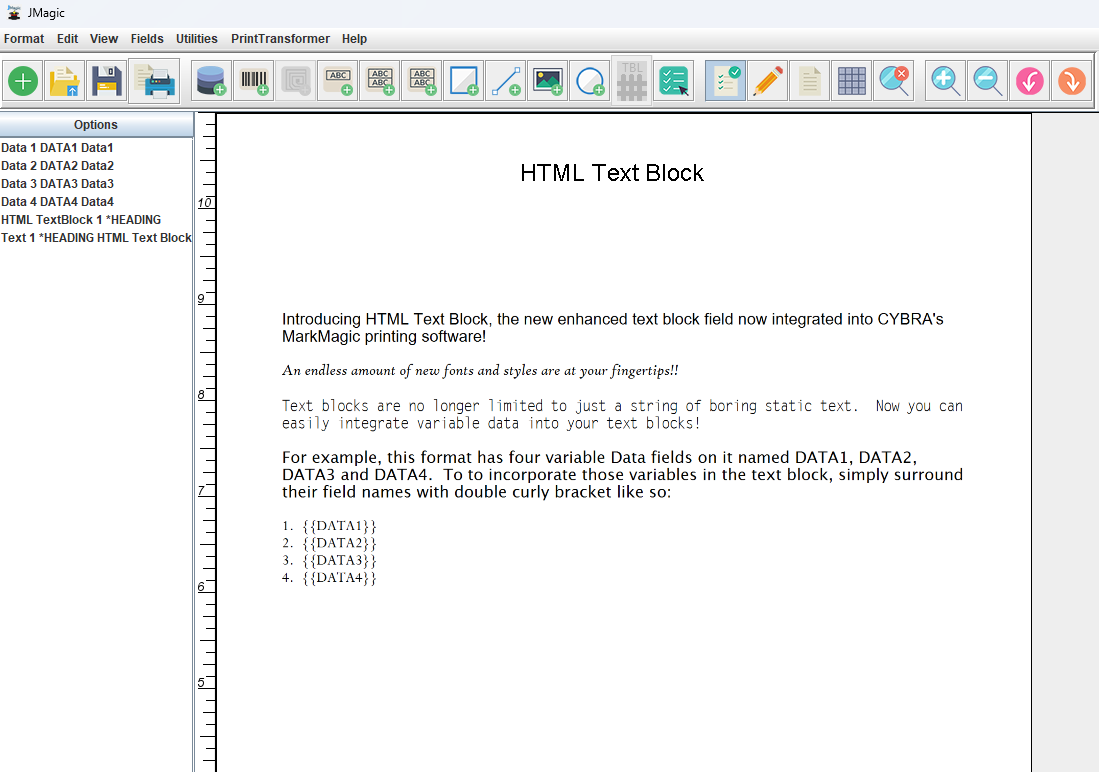
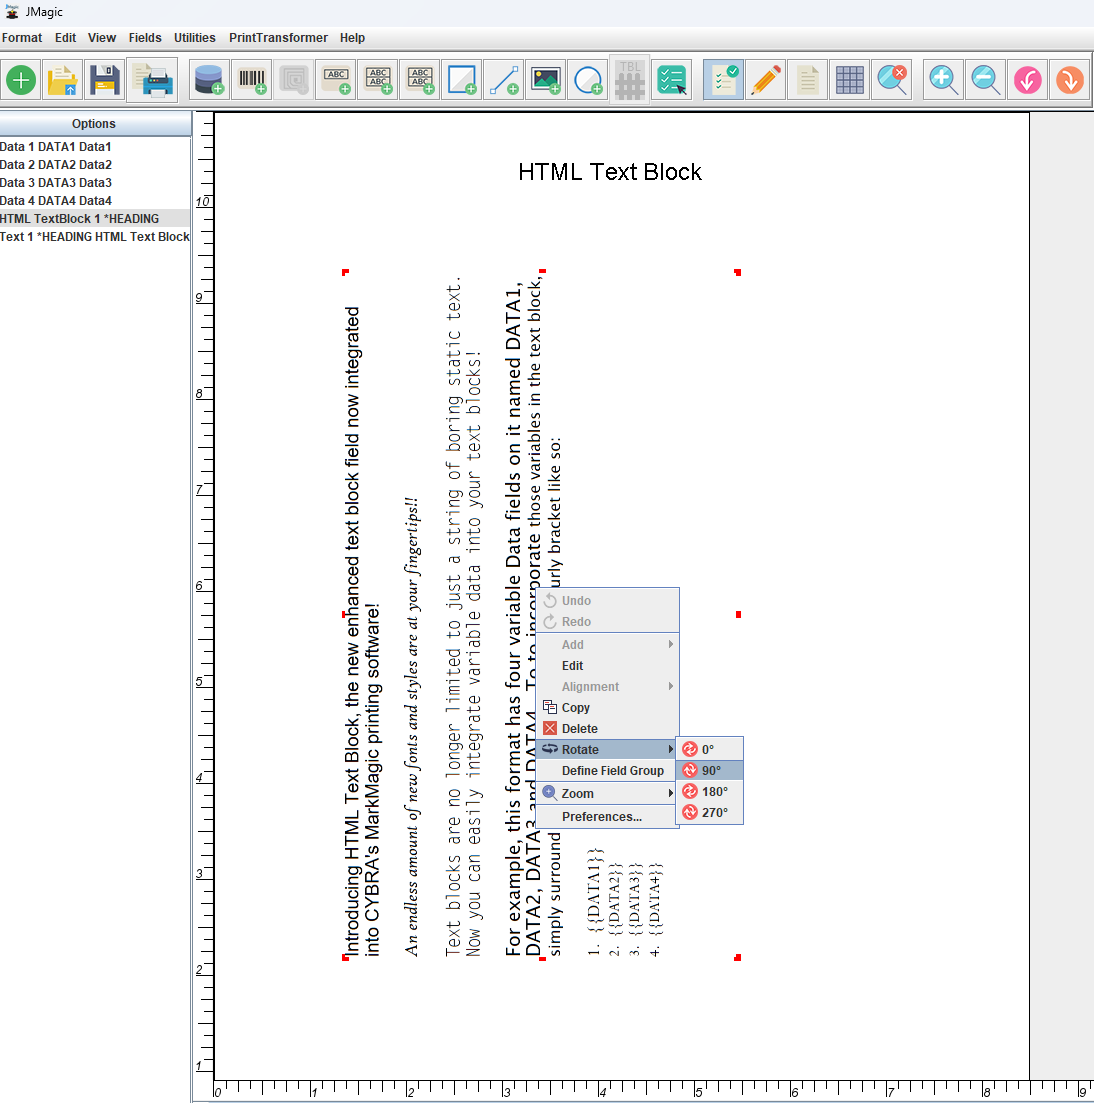
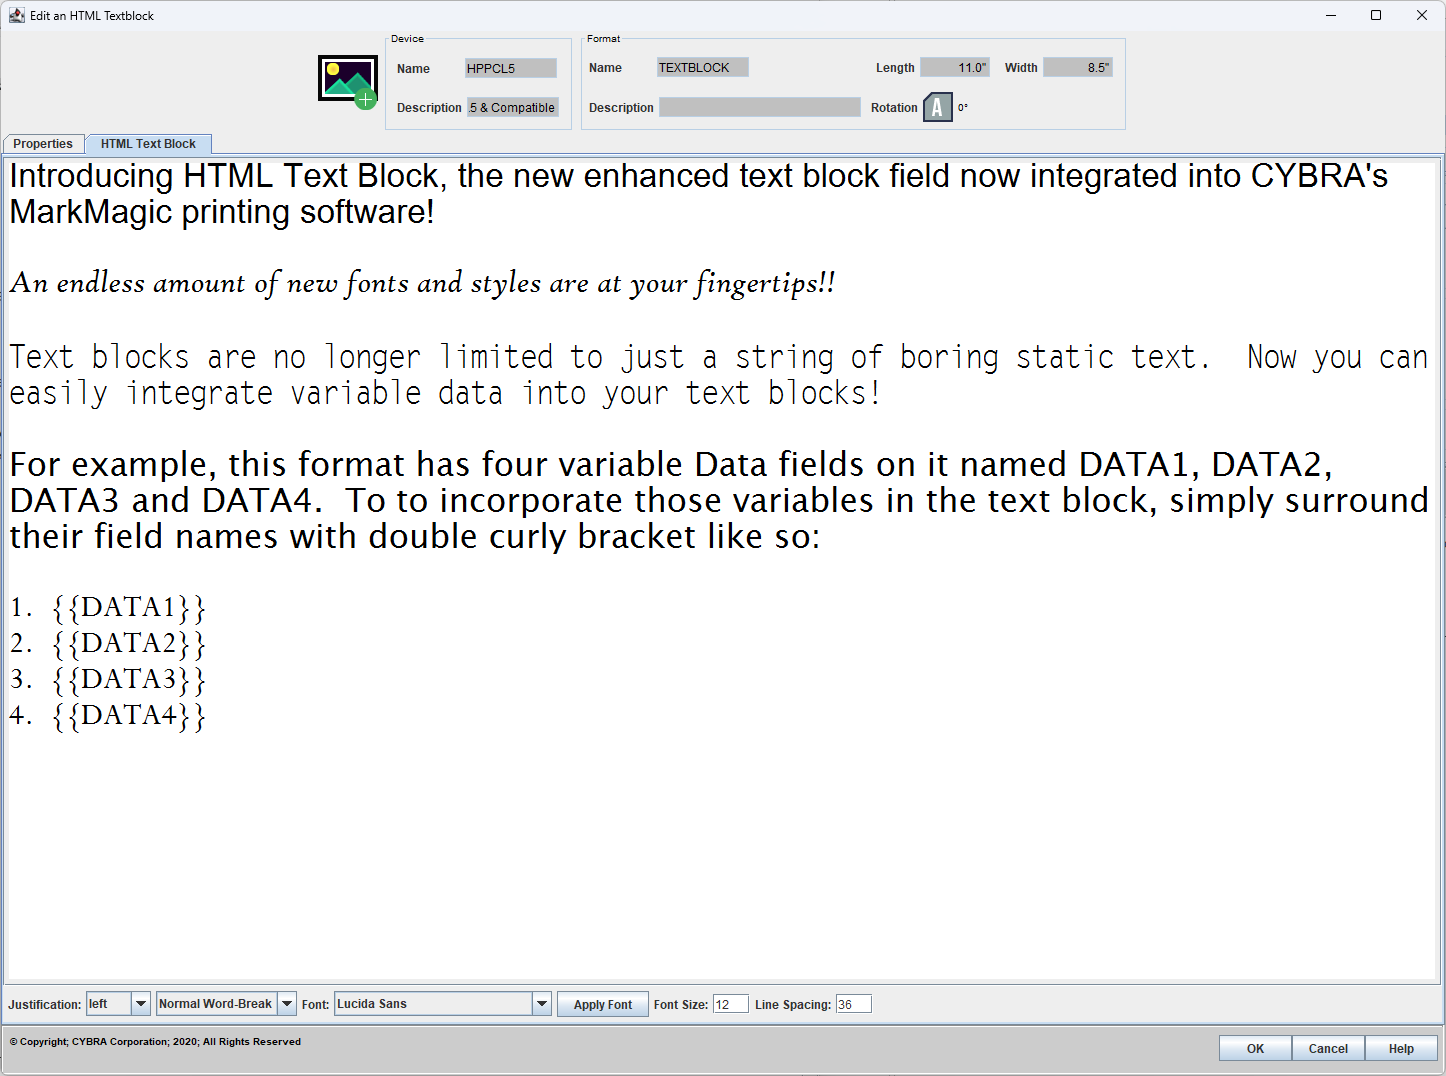
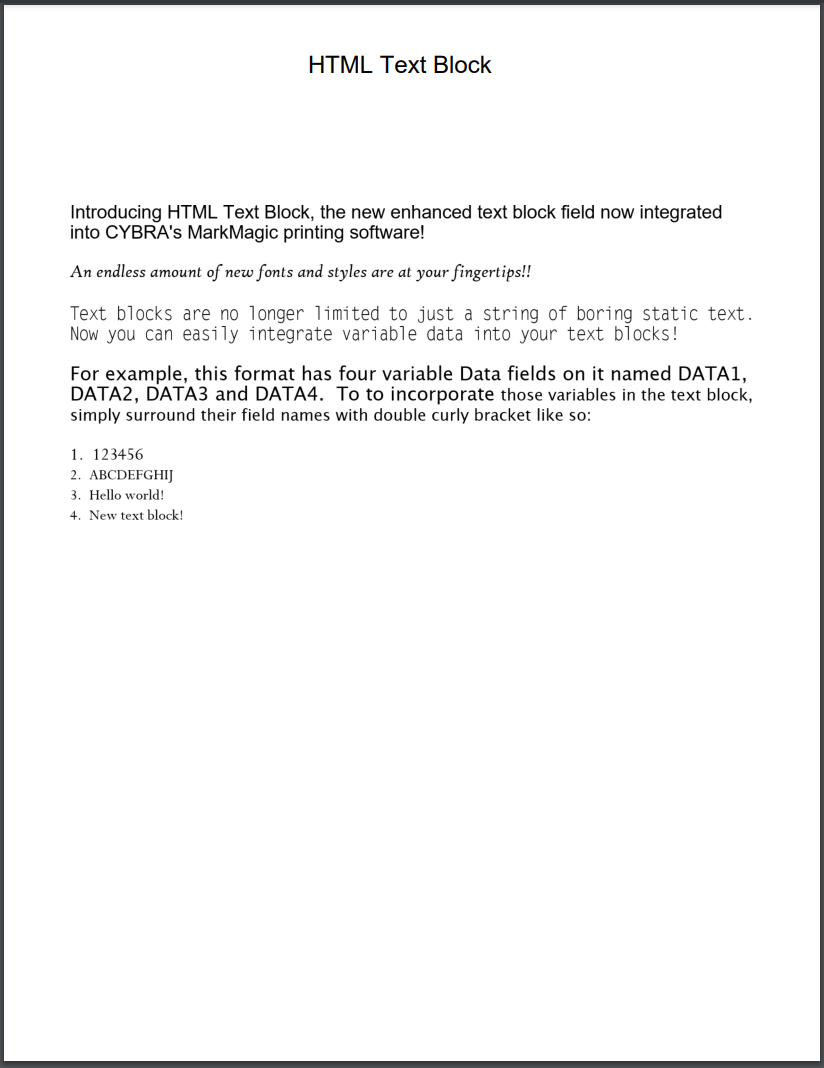
In the example above, we can see four typical Data fields on the field list. See Create a Data Field for more information. These Data fields would normally be used in *LINK text or barcode fields to print information on the form. Now, these same Data fields can be incorporated into an HTML text block by placing curly brackets around the Data field name. {{DATA1}} will print whatever information is passed into DATA1 at print time.
When printing with the example CSV data shown below, and we can see the variable information placed in the correct spots. With HTML text blocks comes an entirely new way of designing formats in MarkMagic. The options are limitless with variable field placement and formatting/styling options now available with the new HTML text block field.

After creating the text block, HTML Text Blocks can also be rotated by using the Right Click Menu as seen here: